

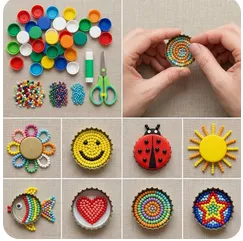
Making custom jewelry beads from plastic bottle caps is a fantastic way to upcycle. Most plastic bottle caps are made of High-Density Polyethylene (HDPE), which is marked by a recycle symbol with the number 2 in the middle. HDPE is ideal for DIY crafting because it has a relatively low melting point, fuses together tightly, and does not release toxic fumes when melted properly without burning
You can transform these caps into colorful, rock-hard beads using two completely different methods depending on the tools you have on hand.
Method 1: The Melting & Reeling Method
This method produces highly durable, multi-colored round beads by melting thin strips of plastic directly onto a wire mandrel.
What You Need:
• Clean plastic bottle caps (HDPE #2)
• Heavy-duty craft scissors
• A craft heat gun
• A metal wire, thick needle, or metal hook
• Heat-resistant or heavy garden gloves
• A container of cold water
Step-by-Step Instructions:
1. Prep and Shred: Thoroughly wash and dry your collection of bottle caps. Use your scissors to carefully cut the caps into thin strips, roughly 2 mm in width. Sort them by color so you can design your patterns.
2. Fuse the Starter Strand: Put on your protective gloves. Take a few strips of different colors, line them up end-to-end, and gently heat the tips with your heat gun until they soften. Press the softened ends together to create one long, multi-colored plastic strand.
3. Reel the Bead: Warm the beginning of your plastic strand with the heat gun until it is sticky and pliable. Anchor it to your metal wire or thick needle, then slowly rotate the wire to reel the softened plastic around it. Apply continuous, gentle heat from the gun as you roll to build up the thickness and layer the colors into a bead shape.
4. Final Fusion: Once your bead reaches the desired size, cut the plastic strand. Keep the bead on the wire and rotate it under the heat gun for an additional 2 to 5 minutes. This ensures all internal layers completely fuse into a solid, ultra-smooth exterior.
5. Cool and Remove: Submerge the hot bead (still on the wire) directly into a container of cold water to snap-cool it. Once it is completely cold, gently twist the bead to slide it off the metal wire. The wire naturally leaves a perfect center hole for stringing!
Method 2: The Flat Molded Method
If you do not own a heat gun, you can compress the caps into a flat sheet or mold them into solid geometric shapes using kitchen appliances.
What You Need:
• Clean plastic bottle caps
• A sandwich press or toaster oven (strictly designated for crafting)
• Non-stick baking paper (parchment paper)
• Silicone molds (like gem or bead molds)
• A power drill with a small drill bit
• Sandpaper and clear gloss varnish
Step-by-Step Instructions:
1. Melt the Caps: Line your sandwich press with non-stick baking paper. Place your bottle caps close together on the paper, fold the parchment over the top, and close the press. Let them melt down into a soft, dough-like plastic puck. [1]
2. Mold the Shapes: Wearing heat-resistant gloves, carefully pull the hot, pliable mass of plastic apart and press chunks of it firmly into your silicone molds.
3. Cool and Drill: Let the silicone mold cool completely before popping the hardened plastic shapes out. Because they were molded solid, use a power drill with a thin drill bit to bore a hole straight through the center of each piece. Tip: Place the plastic on a scrap piece of wood while drilling to protect your table.
4. Finish: Use fine-grit sandpaper to smooth down any rough edges or drill burrs. Wipe away the dust and coat them with a spray gloss varnish to make your recycled beads shine!
⚠️ Crucial Safety Tips
• Work in Ventilation: Even though HDPE is generally safe and doesn’t emit highly toxic fumes, melting any plastic can release a strong odor. Always work outdoors or in a highly ventilated room, and wear a protective mask.
• Avoid Open Flames: Do not use a lighter or candle directly against the bottle caps if you can avoid it. Direct flame will burn the plastic, turn it black, and create heavy black smoke.
• Dedicated Tools: Any sandwich press, toaster oven, or scissors used to melt and cut plastic should be retired from kitchen use and kept strictly for crafting.